I’ve moved
January 23, 2016
Hi all,
For the last little while I’ve been blogging my recipes on my main blog, gnatj.com.
Some of the recipes I’ve posted are:
If you want to keep up with my food related posts (and my regular posts) you can like my Facebook page here: A Bit of This A Bit of That.
Sugar free, no bake crunchie biscuits
August 4, 2015
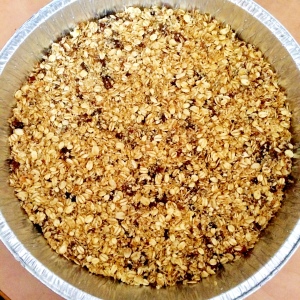
Paul asked me if I could make him some sugar free crunchie biscuits and I found this recipe online. As usual, I’ve made some changes because of the ingredients I had on hand differed slightly. They don’t look as pretty as the originals but they are yummy.
Ingredients
- 1 cup ground quick oats
- 1 cup unground quick oats
- 50g ground walnuts
- 100g chopped raisins
- 50ml canola oil (if I had coconut oil I would definitely have used that rather)
- 6 tablespoons honey
Method
- Mix both cups of oats, walnuts and raisins together.
- In a pan or microwave, melt the oil and honey on low heat.
- Add liquid to dry ingredients and mix well.
- Spread into a greased tray and refrigerate for 2 hours.
- Cut into squares (I only had a round tray so mine will be a bit non-squarish) and enjoy with a cuppa.
Shakshuka
August 2, 2015
On Thursday I was given a bag of tomatoes. They were almost too ripe.
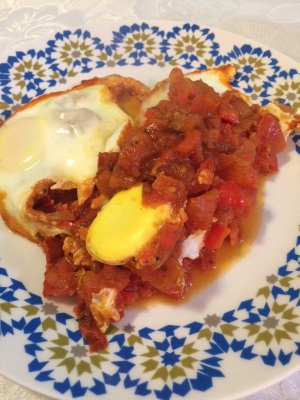
I asked online for some suggestions of what to do with them and shakshuka jumped out at me. I love shakshuka. Its one of my favourite Israeli dishes. And its an all in one pan cook and serve recipe so very little washing up!
Ingredients
- Oil for frying
- 1 x onion, diced
- 1 x red pepper, diced
- 8 x tomatos, diced
- Garlic
- Spices (usually cayenne pepper or something a little spicy)
- Salt and pepper, to taste
- 6 x eggs
Method
- Heat the oil in a large, heavy pan. You can split the ingredients into two smaller pans if you want to serve the shakshuka in personal servings.
- Throw in the onion and saute until golden.
- Add the red pepper and simmer for 5 minutes.
- Add the tomato and garlic and stir until its all mixed together. Simmer on medium heat for 10 minutes or until the mixture starts to reduce.
- Add the spices, salt and pepper to taste.
- Now the fun part, crack the eggs directly on top of the tomato mixture, making sure they are evenly spaced.
- Cover and simmer until the eggs are done to your tastes, less time for runny eggs, more time for hard eggs.
- Serve directly from the pan with a side of fresh white bread to mop up the sauce.
Chocolate Ganache
June 29, 2015
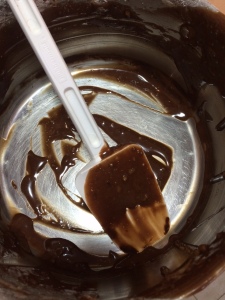
Before I start let me just say, YUMMY! The ganache almost didn’t land up on the cake, I almost ate the whole thing straight out the pot!
So… I made a chocolate cake and didnt have any icing sugar. What I did have was cream and chocolate so I made a ganache.
All the recipes I found were pretty easy, a basic ganach recipe calls for a 1:1 ratio of chocolate and cream. For a more liquid ganache add more cream, for a thicker ganache add more chocolate.
Ingredients
- 200g heavy cream (I used a 250ml box of 32% cream)
- 200g dark chocolate (you can use pretty much any chocolate, I think white chocolate would be amazing)
Method
- Heat the cream until it is steaming but not boiling.
- While the cream is heating, chop the chocolate into small pieces, the smaller the easier and quicker it is to melt.
- Remove the cream from the heat and add the chocolate.
- Stir with a wooden spoon until the cream and chocolate are combined.
- Allow to cool and thicken and then pour over your cake.
- Start at the centre of the cake and allow the ganache to run over the sides.
- I placed my cake in the fridge so the ganache set a bit.
Apparently, if you have patience, you can let the ganache cool and then you can whip it and then spread it on the cake.
Also, if you want to make chocolate truffles, increase the amount of chocolate to cream ratio, allow the mixture to cool and thicken and then roll into balls and coat in cocoa.
I have to say thank you to The Cupcake Lady, Angel for answering all my questions on Twitter when I was so impatient to ice and eat the cake 😉
Seriously decadent chocolate brownies
June 7, 2015
I asked a foodie group on FB to suggest a dessert that would travel easily as we were going to my brother in Tel Aviv via the train.
One of the suggestions was Nigella Lawson brownies.
I googled and found this recipe.
Now, I have to admit, I have never made regular* ‘from scratch’ brownies. I’ve always used a box mix. Never again! I am never ever buying box mix brownies again. These were so easy and so amazingly yummy! Will definitely be making them again and again. And again!
I used slightly different quantities, mainly because they are the amounts I had available. And it turned out ok, so I am giving you what I used. If you prefer, click on the link above for the original recipe.
Ingredients
- 250g softened margerine (I used marge since I wanted my dessert to be dairy free)
- 300g dark, milk free chocolate
- 6 large eggs
- splash of vanilla extract
- 500g caster sugar (I used brown sugar that I whizzed in the blender to make it fine like caster sugar)
- 225g flour
- pinch of salt
- 300g chopped walnuts
Method
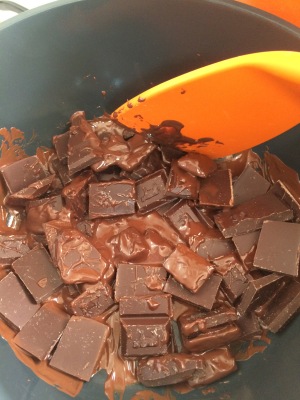
- In a large pan, over a low heat or in a double boiler, melt the margarine and chocolate (break the chocolate into squares so it melts evenly).
- While that is melting mix your eggs, sugar and vanilla in a separate bowl.
- Check on your butter and chocolate and give it a stir to make sure that it is melting properly.
- Measure out your flour and add the pinch of salt.
- Once your marge and chocolate are melted remove from the heat and let cool for a few minutes.
- While it is cooling, throw the walnuts into the blender and whiz until they are mostly chopped finely, leaving a few larger chunks if you like.
- Now, add the egg mixture to the chocolate mixture while beating with a hand held beater or in your mixer, the reason you are beating while pouring is so that the eggs don’t scramble in the hot chocolate.
- Once that is mixed together well, add the flour a bit at a time until it is completely mixed in.
- Lastly mix or fold in the walnuts.
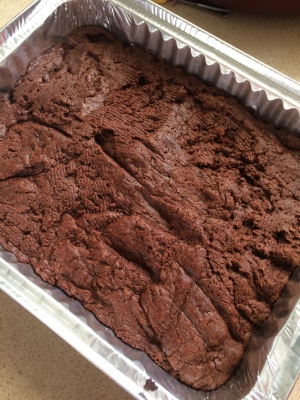
- In a deep pan lined with baking paper, pour in your mixture.
- There will be mixture that doesn’t fit in the pan (regardless of how big the pan is, there WILL be left over mixture), make sure your kids are not around and using a spoon or spatula, scoop all that left over mixture into your mouth, thank me later!
- Bake the brownies at 180°C for about 25 minutes. The top of the brownies will look pale and slightly bubbly.
- Remove from the oven and allow to cool for an hour or so.
- Slice the brownies straight in the pan, you should get about 32 pieces.
- Serve with whipped dairy free cream and enjoy.
Oh! These are even better the next day, if any of them survive that long!
*I have made ‘from scratch’ Pesach brownies but thats not really the same…
The Melktert Saga
May 23, 2015
If you follow me on Facebook you would have seen that for Shavuot I was going to make a melktert (this one from FB). Well I did, except it did not set. The custard part is supposed to set enough that you can cut the tart into slices. Mine was still liquid enough that you had to eat it with a spoon in a bowl.
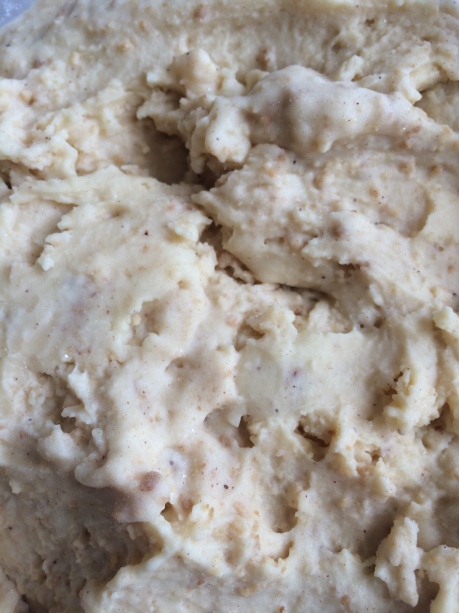
So I was chatting to some friends about it and they suggested that I freeze it and make ice cream, so I popped it into the churner and a yummy melktert ice cream was born.
Below is the recipe I used, I’m not sure if it was the recipe itself, the fact that I did it on the stove top and not the microwave or if it was the ingredients (Israeli not South African) I used that caused it not to set, so if you want to try it out as a traditional melktert give it a go, if it does not set then carry on with the freezing/churning part and make it into an ice cream like I did.
Ingredients
Base
- 125g
- 85g melted butter
Filling
- 1 can condensed milk
- 1 can milk
- 2 cans hot water
- 2 tablespoons butter
- 4 eggs
- 6 tablespoons corn starch
- pinch of salt
- cinnamon
Method
Base
- Crush the biscuits either by placing in a zip lock bag and smashing with a rolling pin or by pulsing in a blender until the biscuits are crumbs.
- Mix the melted butter into the biscuits.
- Press the mixture into a greased dish and either bake for 8 min on 180°C or chill in the fridge for an hour.
Filling
- Combine all the ingredients in a microwave proof bowl.
- Place in microwave on high for 7 minutes, remove and beat.
- Microwave for 5 minutes, remove and beat.
- Microwave for 3 minutes, remove and beat.
- This could be where I went wrong, I didn’t have a microwaveable bowl so I heated the custard on the stove, stirring continuously for about 25 minutes. It did thicken quite a bit.
- Let the custard cool down, stirring occasionally so it doesn’t form a skin, alternatively cover the custard with cling wrap on the surface so the skin cant form.
- Once cool, pour into the dish over the back of a spoon so you don’t break the biscuit base.
- Sprinkle cinnamon over the top.
- Refrigerate for at least 3 hours so the custard sets.
Ice Cream
If your custard didn’t set this is the point where you turn it into ice cream.
- Pour the unset custard into your churner and churn as per instructions.
- Transfer the ice cream to a freezer proof bowl,cover and freeze until hard.
- If you don’t have a churner you can place the custard into a freezer proof bowl, cover and freeze for at least three hours, remove every hour or so and mix well so ice crystals don’t form.
- I scraped the biscuit base into the churner at the very beginning, you can leave out the base and crumble it on top after the ice cream is made or you can add half to the churner and half over the top later, totally up to you.
**I am going to attempt a new recipe for the melktert so watch this space!
Cheesecake Ice Cream
May 14, 2015
With the Jewish holiday of Shavuot coming up its pretty customary to make a cheesecake and eat ice cream and other dairy yumminess. But I got to thinking, why not make cheesecake ice cream?
So I scoured the web and settled on this recipe from Nigella. I tweaked it a bit since my ingredients were slightly different. Despite the differences it came out so delish!
Here is my recipe.
Ingredients
- 175ml milk
- 200g castor sugar (I cannot find castor sugar in Israel, so I took 200g brown sugar and whizzed in in my blender until it resembled castor sugar)
- 350g cream cheese (I used a ‘New York’ cream cheese which is kind of salty)
- Splash of vanilla
- 1 large egg
- 3 tablespoons lemon juice
- 250ml dessert cream
- biscuits for decorating
Method
- Bring milk to a simmer.
- While milk is heating, beat sugar, cream cheese, vanilla and the egg until smooth.
- Once milk is heated, add the milk to the sugar mixture and whisk very quickly so the egg doesn’t scramble.
- Return the mixture to the stove top and simmer while continuously stirring until the custard thickens.
- Remove from heat and leave to cool to room temperature.
- Once cool, place in the fridge for an hour or two to start chilling.
- Lightly whip the cream and gently fold it into the chilled custard.
- Add the lemon juice and mix gently.
- Now you can add the mixture to your ice cream machine and churn as per instructions or if you don’t have one, transfer the mixture to a freezer proof dish, cover and place in the freezer for at least 3 hours, removing the dish and stirring the ice cream every hour or so to prevent ice crystals from forming.
- Serve with crushed biscuits sprinkled on top or as a filling between two flat biscuits.
Roast Turkey Breast
April 10, 2015
I picked up a 1.2kg turkey breast the other day. After asking the internets for their favourite recipes I decided to make a roast. This amount of turkey served with grains and a salad was enough to feed 8 people.
Ingredients
- Skinless, boneless turkey breast
- Oil
- Red wine (I used a merlot that had been given to us as a gift)
- Spices, whatever you have in the rack (I used a shishkebab seasoning, since its all I had that was pesadich)
- Tomato paste
- Hot water
Method
- In a roasting dish place your turkey breast and sprinkle with the spice(s). Use as much or as little as you like, this is to your taste.
- Drizzle a little bit of oil over the top of the breast.
- Splash a little of the wine over the breast.
- Cover with foil and place in the oven for 20 minutes at 180°C.
- While the turkey is in the oven, mix the tomato paste, a bit more wine and some hot water in a bowl to make a sauce. The more sauce you make the more sauce you will have when its done cooking.
- After 20 minutes remove the roasting dish from the oven and uncover the turkey.
- Pour the sauce over the turkey and return the roasting dish to the oven, uncovered.
- Baste the turkey with the sauce every 10 minutes or so for another 40 minutes.
- The hour of cooking time above is perfect for a 1kg breast. Add 5 – 10 minutes cooking time per 100g over 1kg.
- Remove from the oven and cover loosely with tin foil. Allow to sit for 10 minutes.
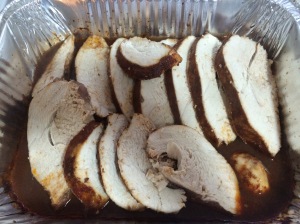
- Remove the turkey from the roasting dish and carve like you would a meat roast. Return the slices to the sauce and keep warm until you are ready to serve.
- Serve with rice or quinoa. I used black quinoa and it was delicious!
**We had leftovers and ate them warmed up the next day for lunch, it was even better than the night before!
Pesach Chocolate Brownie Cake
April 10, 2015
Pure decadence! This cake comes out with a soft gooey centre and a thin crispy top. It is very very rich and very very delicious.
Ingredients
- 250g dark parve chocolate
- 1 large egg, beaten
- 1 cup potato flour
Method
- Break the chocolate into pieces and slowly melt it over a low heat.
- Once the chocolate is almost completely melted, take it off the heat.
- While continuously, briskly, stirring the chocolate, add the beaten egg. Make sure to stir fast so that the egg doesn’t cook!
- Add the potato flour and combine.
- Transfer the ‘dough’ into a small, low sided pan.
- Bake for 12- 15 minutes at 180°C.
- Serve with cold custard or vanilla ice cream.
Carrot and red onion soup
April 9, 2015
We landed up with two bags of carrots, way to much to eat before they went off, so I decided to make a carrot soup.
Ingredients
- Carrots, peeled and chopped into medium chunks
- Red onion, peeled and chopped into chunks (I used two small onions)
- Stock powder (I used chicken stock powder, you can use vegetable stock or maybe even mushroom soup powder)
- Oil for frying
- Water
- Walnuts, toasted (I used about half a cup. Also walnuts in their shells are far cheaper than ones already shelled, also its fun to use a heavy bottomed pan and go all HULK SMASH on them, although its quite messy)
Method
- Add carrots, onions and a tablespoon or two of dry stock powder to a large pot.
- Drizzle with a bit of oil and lightly fry the veggies until the stock powder is dissolved.
- While frying, bring a kettle of water to the boil.
- Cover veggies with water, just above the veggies should be enough.
- Bring the water and veggies to a boil and then cover and turn down the heat to simmer.
- Simmer until carrots are soft.
- While the veggies are simmering, toast some walnuts.
- Once the carrots are soft, add half the toasted walnuts.
- Blitz the veggies for a smooth, thick soup. (Its ok if its not completely smooth, it still tastes delicious!)
- Roughly chop the remaining walnuts and add to the top of the soup as a garnish.
- Enjoy!

